Who can run a retrospective?
Note that you must have either an Administrator or a Facilitator role to run a retrospective. Click here to learn more about the different roles available in Neatro.
How can I start a retrospective?
Follow the instructions in this article to start your first Neatro retrospective.
Before getting started, you can watch a complete retrospective onboarding video presented by Anders Rojewski, co-founder of Neatro:
What are the different steps of a Neatro retrospective?
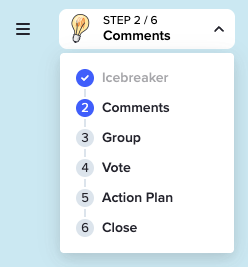
A Neatro retrospective consists of four main steps: Comments, Group, Vote, and Action Plan.

It is also possible to start a retrospective with an Icebreaker activity. If you enable the Start with an icebreaker option on the setup page, your retrospective will begin with an additional Icebreaker step.
Once the discussion is complete, the Facilitator can move to the Close step. This final step closes the retrospective and generates the retrospective report, where you can review the comments, votes, topics, and action items created during the session.
Step 1: Comments
The purpose of this step is to allow participants to write and post comments in the different columns of your board.
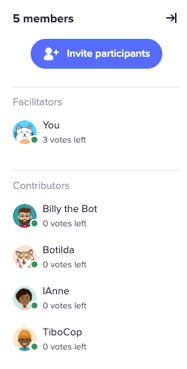
Before that, the first thing you may want to do is invite participants to your retrospective.
To do so, click on the Invite button (upper-right corner of the screen). This will open a window with a pre-generated share link.
Two invite link options are available:
Join as a team member
Allows people to participate in the retrospective, join your team, and gain access to your team’s retrospective history. A Neatro account is required (it’s free).
Join as a guest
People can enter the retrospective without a Neatro account. They will not have access to any retrospective reports.
Choose the option that best suits your needs and share the link with your teammates.
Once everyone has joined, it’s time to add your comments. Each column helps you organize your ideas. Try to be as specific as possible so your teammates can easily understand your comments. You will be able to group similar ideas in the next phase.
Note that you can set the Timer at any step of the retrospective.
Also, participants cannot see what others are writing at this stage, as long as the Facilitator has not revealed the comments.
To reveal the comments, the Facilitator must move on to the next phase (Group), either by clicking one of the two “Group” buttons:
- the Group button in the action bar at the bottom center of the screen
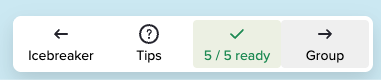
- or the Group button in the upper-left menu

Everyone will move to Step 2 once the Facilitator clicks Confirm.

Step 2: Group
This step allows you to group similar comments and attach or create topics.
When you arrive at this step, the comments written during the Comments step automatically appear.
To make facilitation easier, Neatro may automatically suggest groups of comments if the AI detects similar themes.

The AI is designed to save time, but some suggestions may not be ideal.
For each suggestion, you can:
-
validate it by clicking the ✔️ icon (the group will be created)
-
or reject it by clicking ❌ (the comments will return to their original positions).
Important: Only comments written during Step 1 are considered in grouping suggestions. Additional comments added during Step 2 are ignored.
You can also remove a specific comment from a suggested group by hovering over it and clicking the cross icon.

By default, all participants can group comments during this step. AI suggestions are also limited to comments within the same column by default.
The Facilitator can adjust these settings by clicking the Group Options button (upper-right corner of the screen).

You can also manually group comments by dragging one comment onto another.
To add a topic to a comment, click the Add Topic button. Ten default topics are provided, but you can create your own for better results.
Topics are associated with your team and will appear in future retrospectives. Neatro helps you track recurring themes and identify key challenges over time.
Step 3: Vote
Vote on comments to narrow down the items you want to discuss in the next phase.
Each participant receives the same number of votes, which can be distributed across one or multiple items.
The number of votes, as well as other advanced facilitation options, can be adjusted by clicking the settings icon (upper-right corner of the screen).
Participants cannot see other participants’ votes — not even the Facilitator.
However, the Facilitator can see how many votes each participant has remaining by opening the user list (right side of the screen).
Step 4: Action Plan
Discuss the most-voted topics or comments with your team and create action items.
You can use sorting rules and filters to better identify the comments that need discussion.
Assign an owner to each action item and provide a short, clear description so everyone understands the next steps.
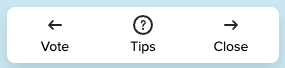
Once the Action Plan is complete, the Facilitator can access the retrospective report by clicking the Close button in the action bar at the bottom center of the screen.
Make sure to measure your retrospective effectiveness by completing the ROTI (Return on Time Invested) module.